Wiggle - Generate a fixed random calculation, even after adding layers
Important notice for English members
This tutorial video has been translated into English with a voice-over, but the software interface remains in French.
Information
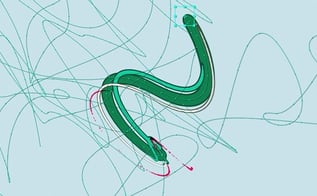
You can learn how to create the lines used in the example with the Mercury Lines tutorial
Learn to control the wiggle expression with 5 arguments to obtain a fixed and random controlled motion, applicable to other layers.
In this free After Effects video tutorial, we’ll take a deeper look at the wiggle expression to better control it.
We’ll see how to generate a fixed wiggle that does not change even when adding other layers to the composition. This will allow us not only to have a consistent animation throughout the project’s progression but also to easily apply the same movement to other layers.
Finally, we’ll explore new wiggle arguments to achieve controlled variations compared to a basic random motion.
- Review of the wiggle expression and its two main arguments: Frequency and Amplitude
- Discovery of a function that produces a fixed random calculation
- Discovery of the 3 other wiggle arguments: Octaves, Amplitude Multiplier, and Time
- Creation of variations from a base movement
Wiggle function parameters for reference
wiggle(freq, amp, octaves, amp_mult, time)- freq: frequency of oscillations (number of variations per second)
- amp: amplitude of motion (intensity of displacement)
- octaves: number of added noise layers (more detail)
- amp_mult: amplitude reduction factor per octave
- time: evaluation moment (defaults to the current time)
Chapters
-
 00:00 Introduction and problem presentation
This After Effects tutorial shows you how to use the Wiggle expression to generate random movements and how to solve the issue of movement changes when adding layers.
-
 00:23 Applying and visualizing the Wiggle expression
Learn how to add wiggle(frequency, amplitude) to a layer and visualize the random movement generated over time.
-
 03:19 Freeze Wiggle with seedRandom()
Learn to use the seedRandom(number) expression to stabilize the Wiggle motion, making it independent of layer indexes and easier to reuse.
-
 04:24 Copy/Paste the fixed Wiggle to other layers
See how to duplicate this combined expression (seedRandom() + wiggle()) to apply an identical and stable random motion to multiple objects.
-
 05:15 Advanced Wiggle arguments (Octaves and Amplitude Multiplier)
Get familiar with the “octaves” argument to control the level of detail and the “amplitude multiplier” to adjust the complexity of the shake.
-
 09:15 Wiggle time offset
Discover the last Wiggle argument, “time,” which allows you to introduce a temporal offset to create subtle variations between multiple Wiggle movements.
-
 10:20 Conclusion and experimentation
Recap the techniques learned to master the Wiggle expression and don’t hesitate to experiment with all parameters to refine your animations.
About the author
I am the Founder of Mattrunks. I work as Creative Director and Motion Designer in my studio. I also create video tutorials to share my passion of motion.